


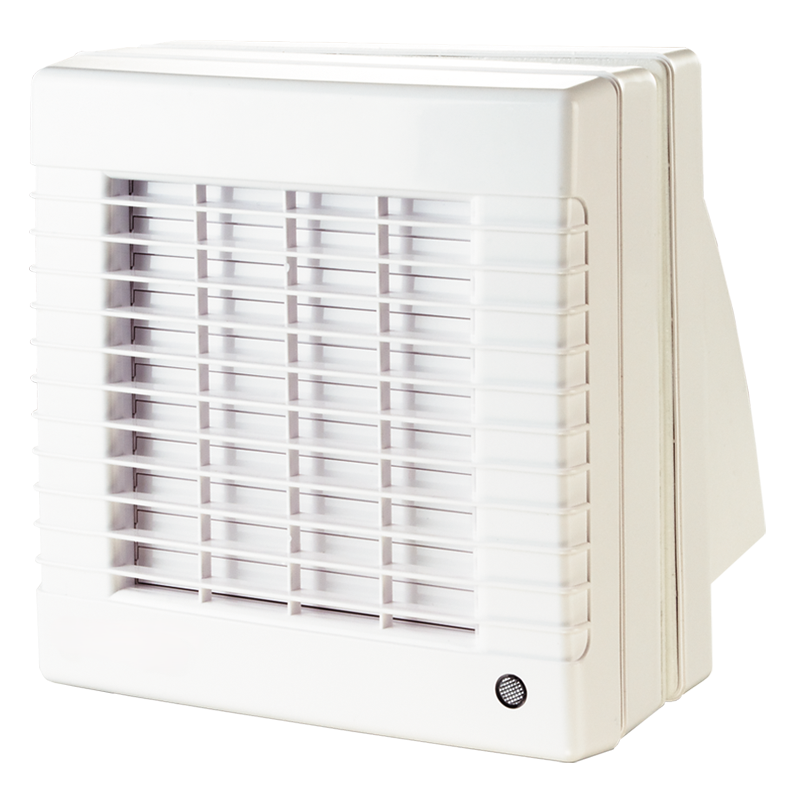
DUKA window ventilator
type MAO2 L
and
type MAO2 L TH
Content
How to use
ProThe product described in this manual is designed for the ventilation of small and medium-sized dwellings, where the dwelling is also heated during the winter period.
Technical data
Power supply: 220-240 V, 50Hz
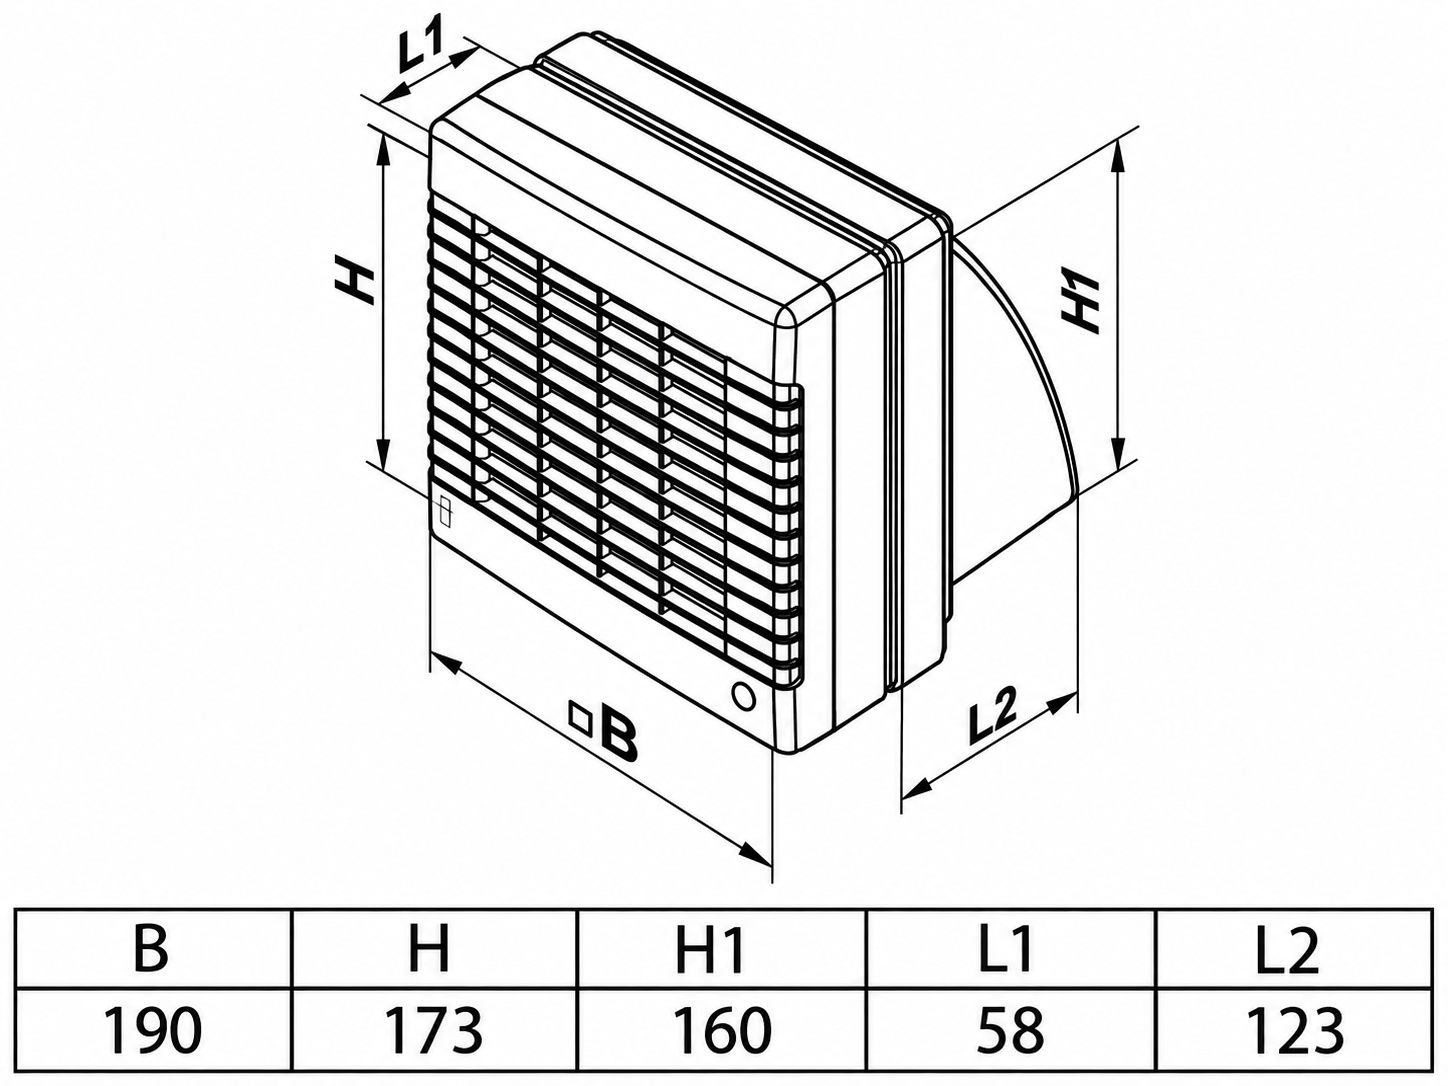
Dimensions: 190 x 173 x 58 mm, Ø125 mm
Glass thickness: 4 mm up to 17 mm
Weight: 1.14 kg
Enclosure rating: IP24
Room temperature: Must be installed in rooms with a temperature from 0˚C to +45˚C
Time interval: 2-30 min. (for the TH model)
Humidity range: 60 - 90 % RH
All electrical connections, adjustments, maintenance and repairs are only permitted after the power has been disconnected.
Electrical connection is only permitted by authorised electricians.
The electrical installation must be connected to a fused circuit.
Before installation, check the fan for any visible damage to the blades and the duct connection. The duct system must be free of any foreign objects that could damage the blades on the motor unit.
Misuse of the device or unauthorised modification is not permitted.
The fan must not be used by children and persons with reduced physical or mental capabilities, without proper practical experience or expertise, unless they are supervised or instructed in the operation of the fan by the person responsible for their safety.
Do not leave children playing unattended with the fan.
Ensure the prevention of the ingress of smoke, carbon monoxide and other combustion products into the room through an open chimney flue or other fire safety devices.
Ensure adequate air supply to the room to guarantee optimal performance of the fan.
The conveyed air must not contain dust or other impurities, sticky substances or fibrous materials.
Do not use the fan in environments containing hazardous or explosive materials, vapours from spirits, petrol, insecticides, etc.
The natural intake and exhaust ventilation channels must not be blocked.
Installation and connection
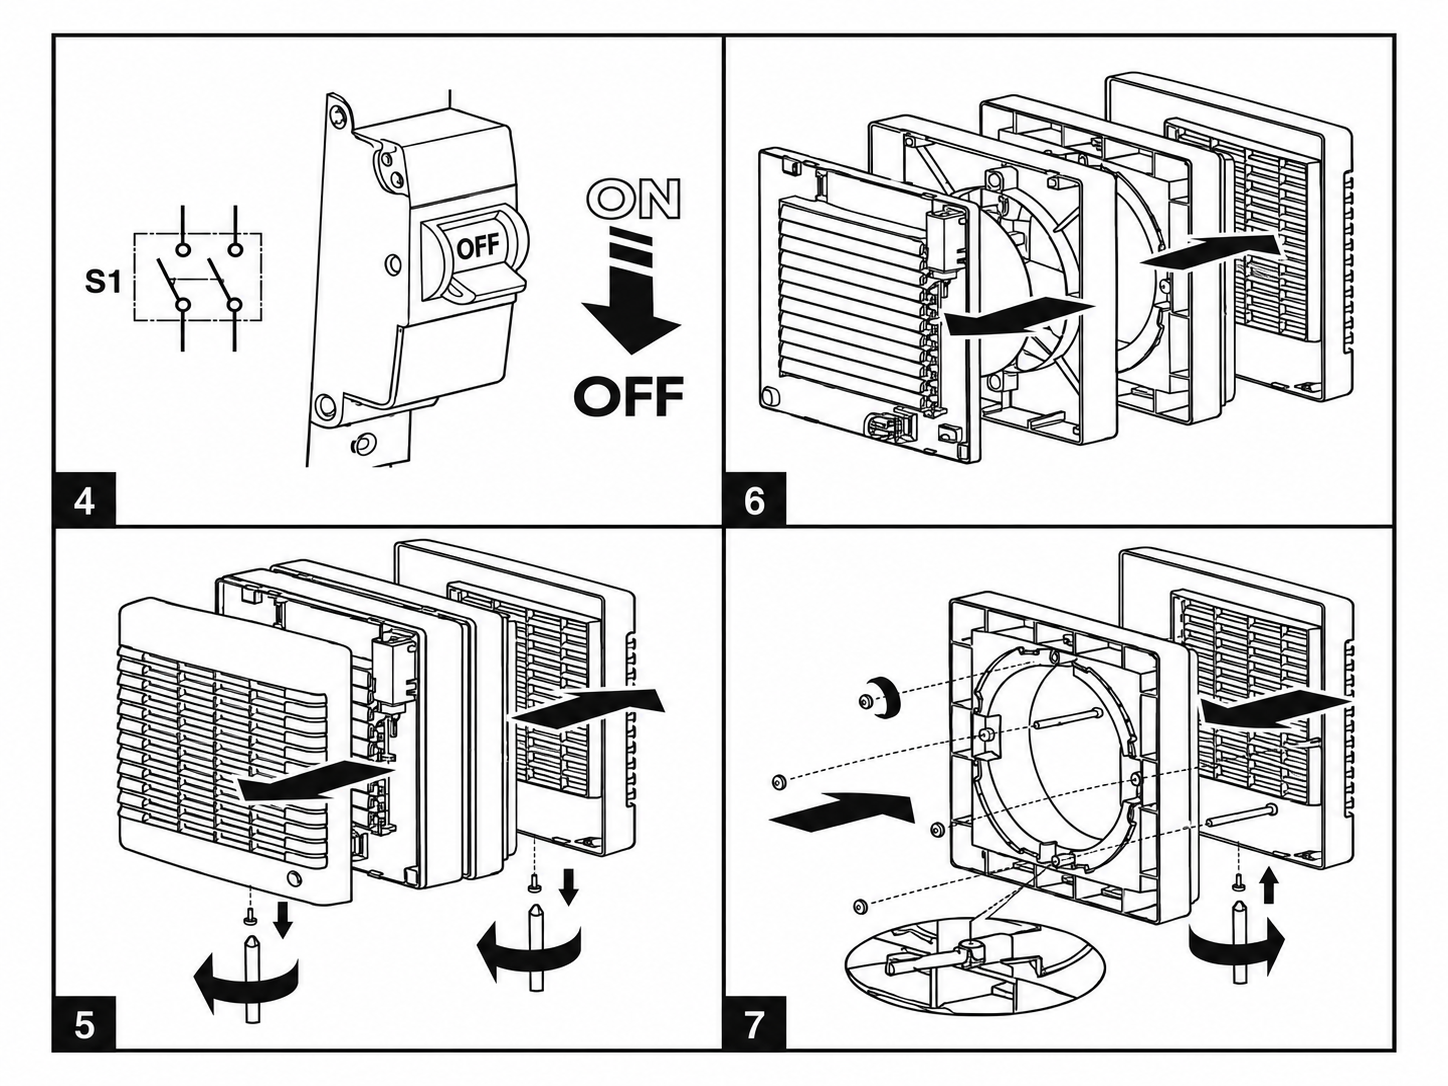
- During assembly and connection, the power must be switched off (fig. 4)
- Remove the cover by taking out the screws on the underside of the front (fig. 5)
- Take the four parts apart (fig. 6)
- Insert the 4 included bolts from the outside into the outermost intermediate piece. Then secure them using the included nuts. The outer screen is refastened using the removed screw (fig. 7)
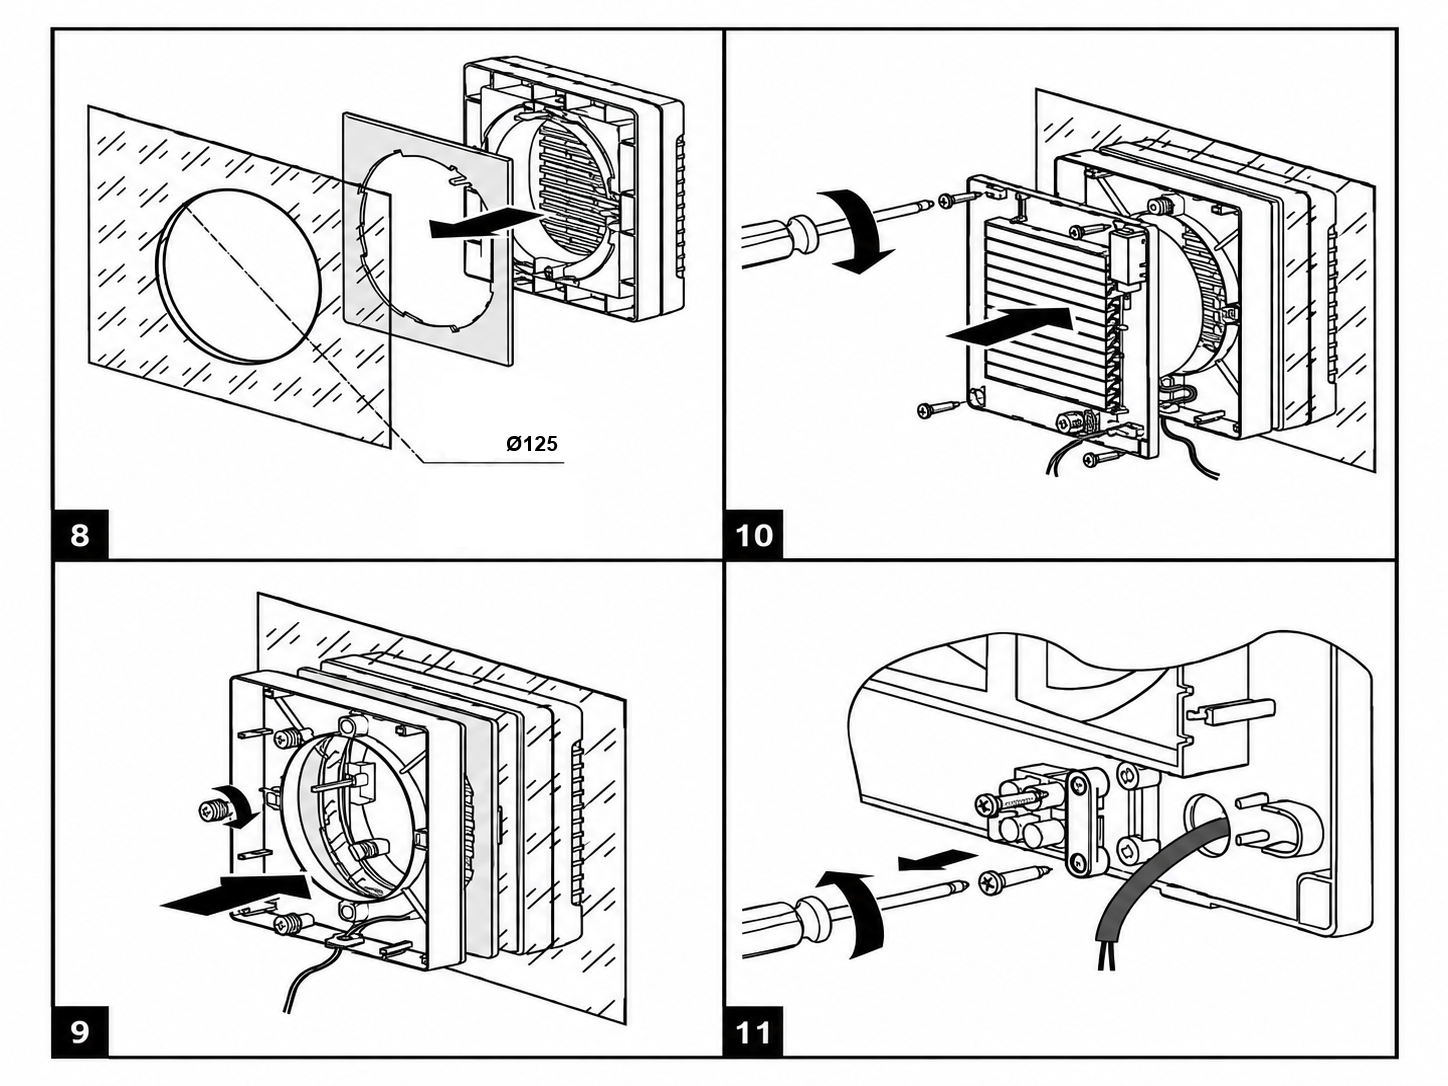
- The fan is designed for glass installation from 4 to 17 mm in thickness. For fans with Ø125 mm, a Ø160 mm hole must be made in the glass. One of the included rubber gaskets is placed between the glass and the external part (fig. 8).
- Fit the second rubber seal onto the other side of the glass. Use the bolts as a guide and fit the second spacer. Make sure that the rubber seal lies completely flat. Secure the spacer with the supplied plastic bolts (fig. 9)
- Pass the cable through the hole in the intermediate piece and then through the hole in the fan unit – secure the fan unit with the 4 supplied screws (fig. 10).
- Remove the 2 screws on the cable holder, and take the holder off (fig. 11).
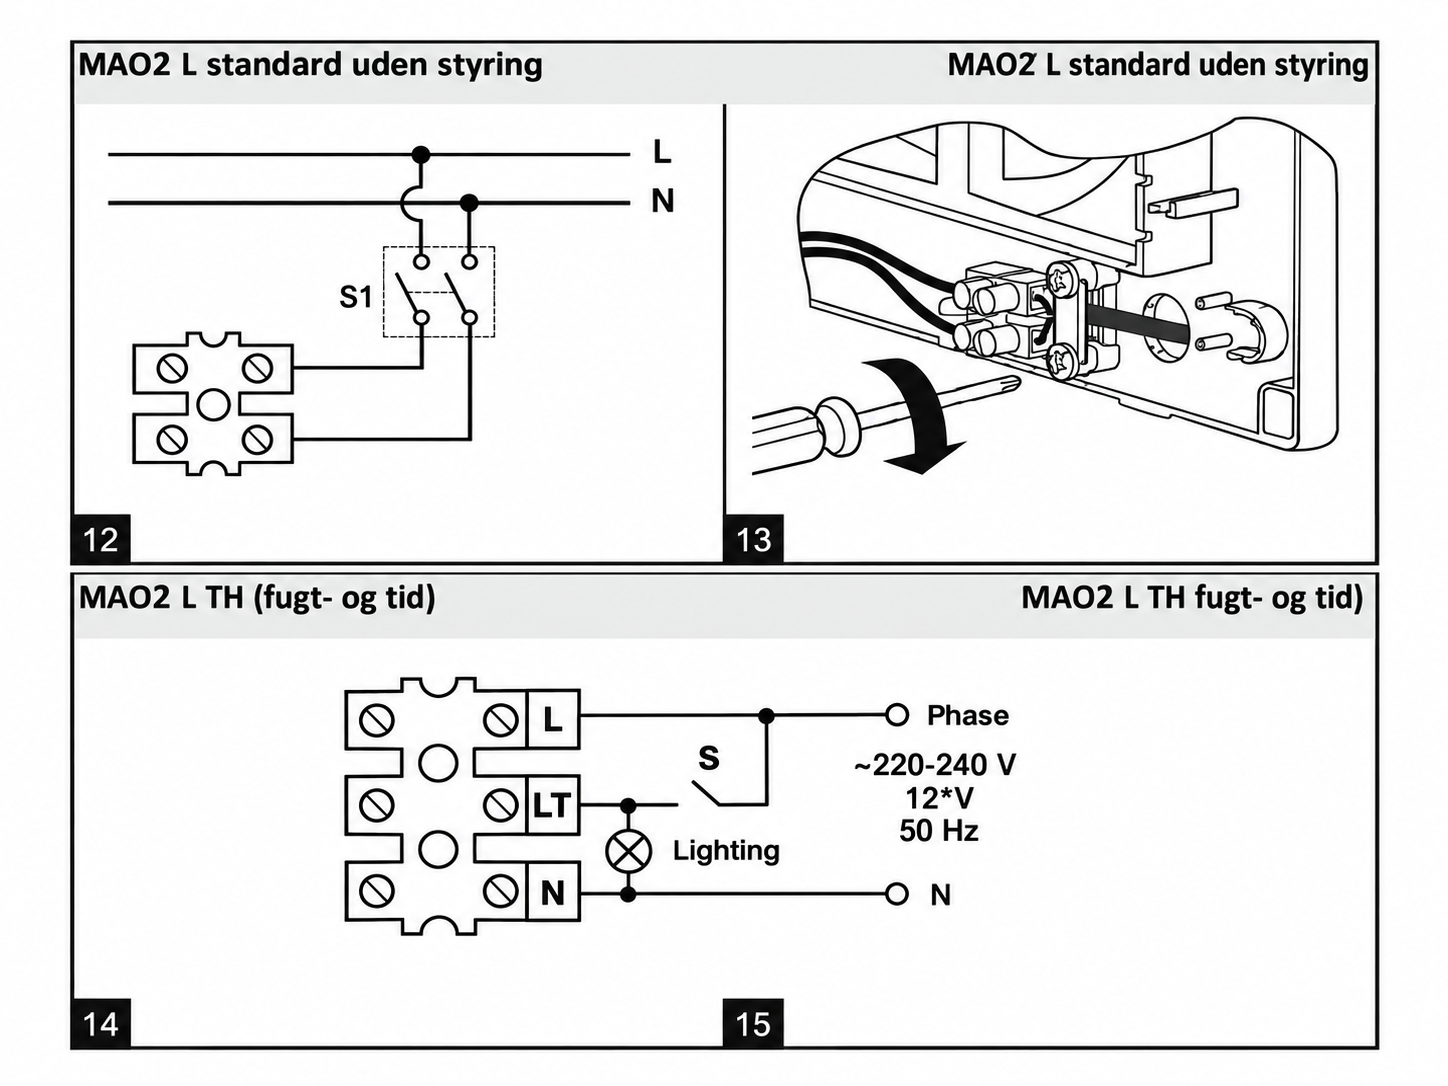
- Connect the wire in the terminal blocks (fig. 13 or 15) by following the diagrams (fig. 12 or 14). Reattach the cable clamp with the screws.
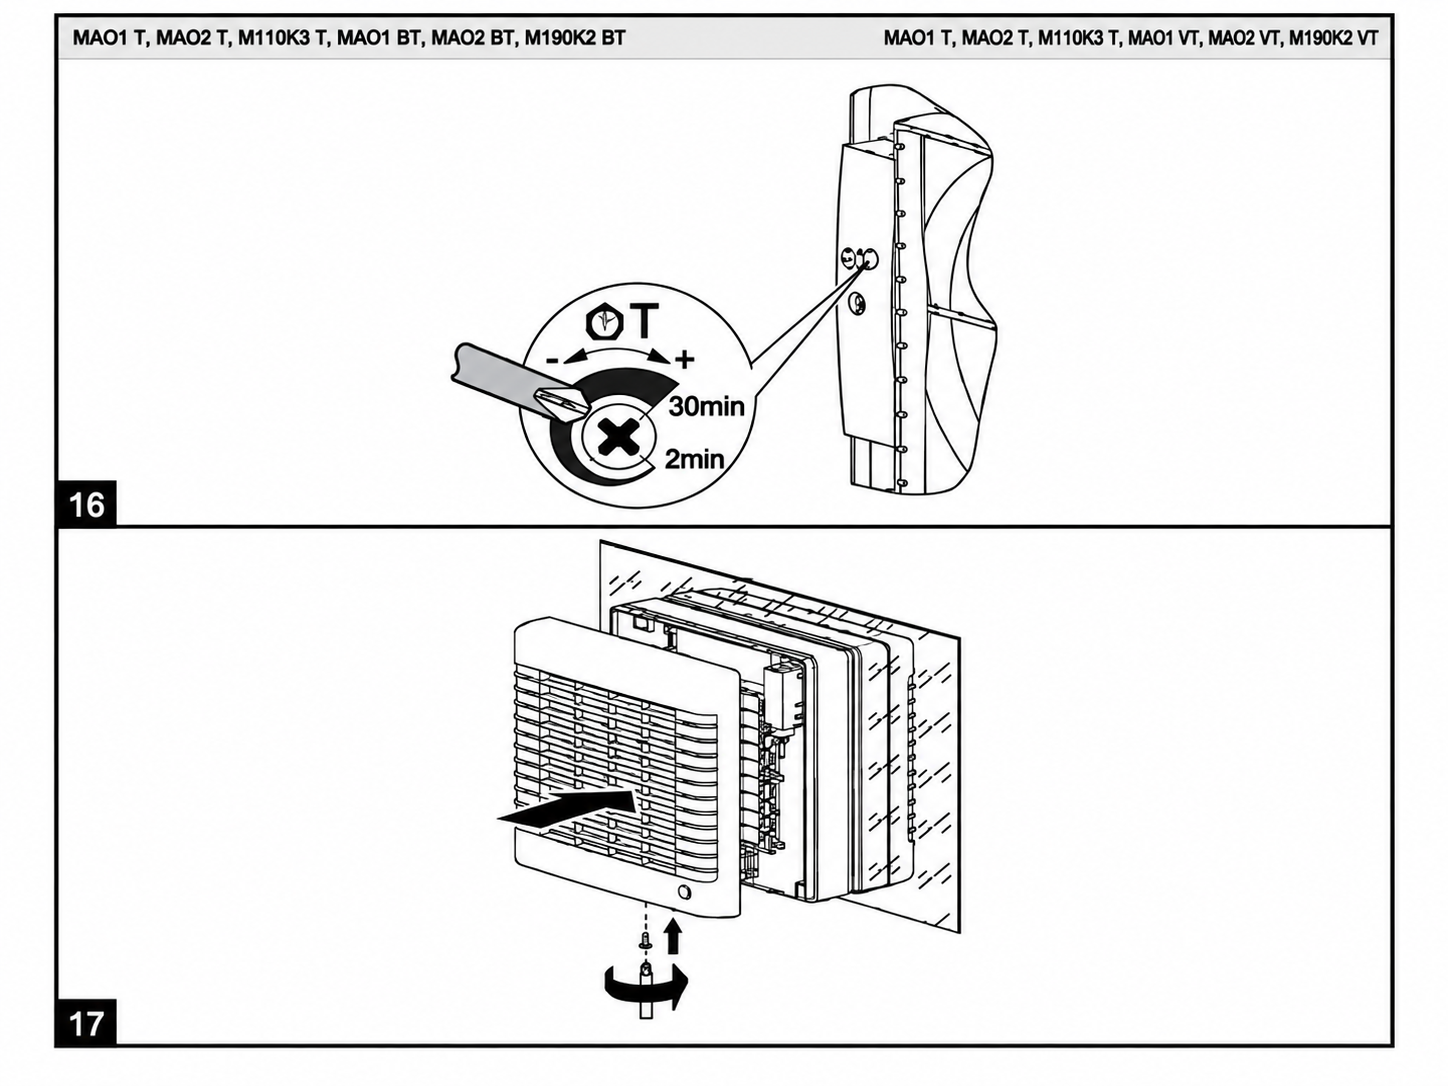
- The TH model has a time adjustment knob (fig. 16), which can be set from 2 to 30 minutes, and a humidity knob, which can be set from 60 to 90 % RH.
Maintenance
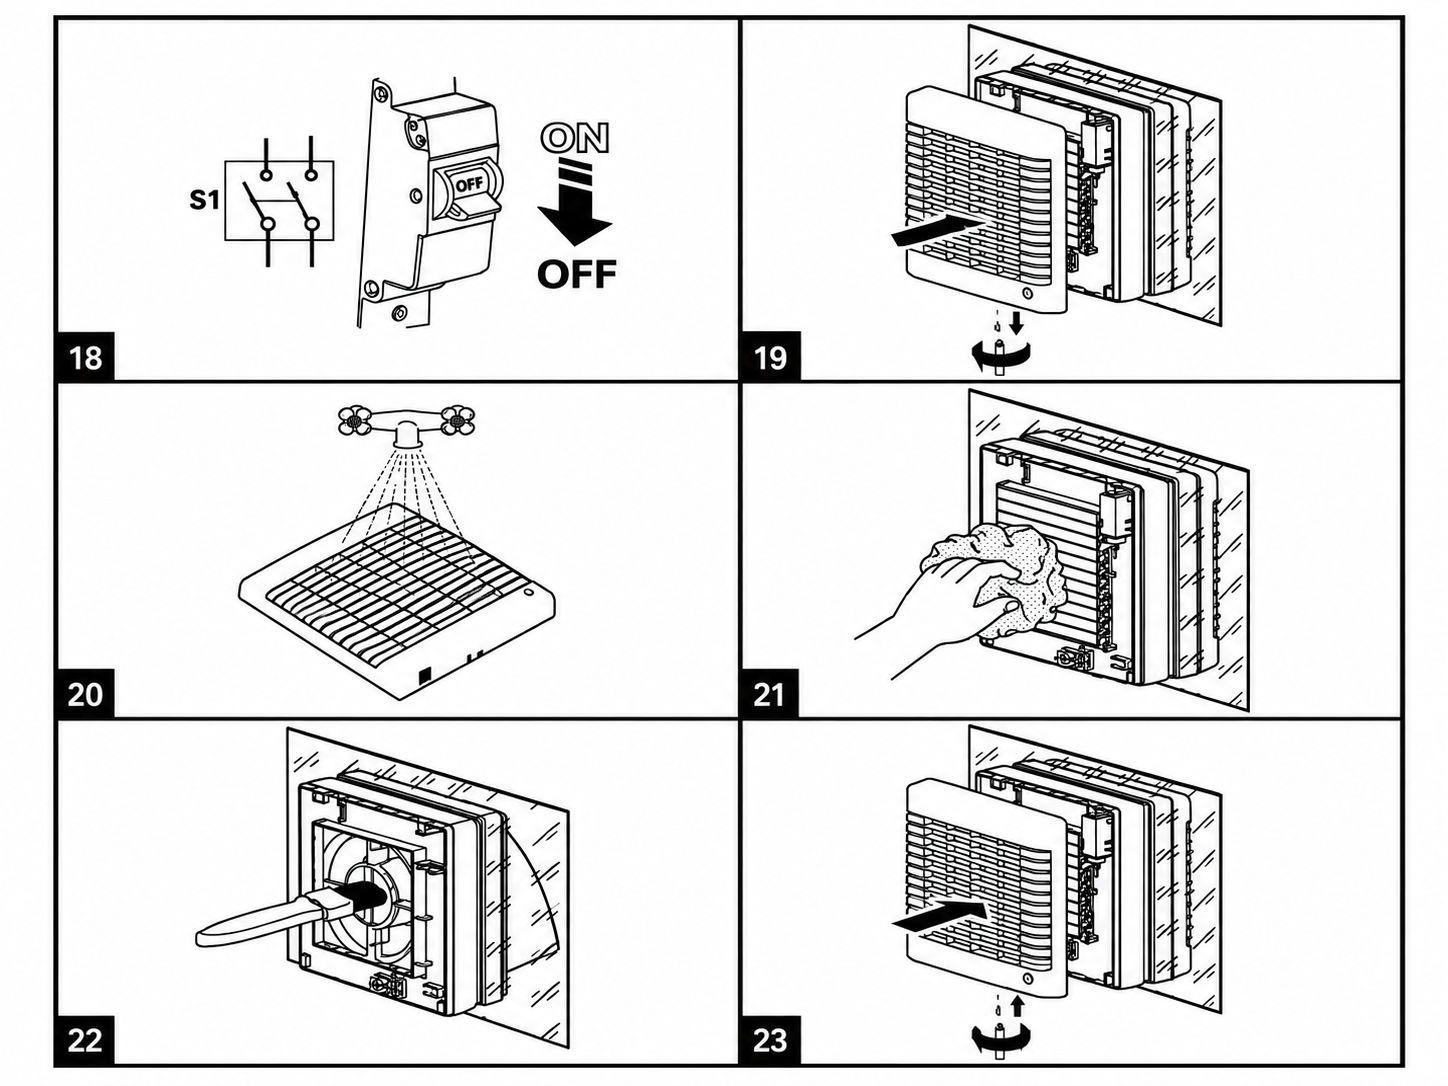
To ensure the fan retains its function and capacity, it must be cleaned at least twice a year, or more often depending on requirements.
See figures 18–23
- Disconnect the power before commencing cleaning
- Remove the front panel
- Clean the front panel with a damp cloth wrung out in lukewarm water with a mild detergent. Avoid water dripping into the motor during cleaning.
- Using a soft brush, clean the body and blades of the fan.
- Reattach the front panel and reconnect the power
Guarantee
The fan comes with a 3-year warranty against manufacturing and material defects.
The guarantee applies under the following conditions:
• The fan must be connected by an authorised electrical contractor. The invoice must be presented as documentation
• The fan must be fitted / installed in accordance with these operating and installation instructions.
• Clean the fans at regular intervals
• The fan is not used in vulnerable locations (e.g. in industry or other places where the fan risks being exposed to solvents, high levels of moisture or various gases, etc.)